The most recent issue of Fine Woodworking had an article about 3d printers and their place in the wood shop, and my experience has been similar to the author’s: it’s super handy to have a 3d printer around, even if your primary focus is woodworking. (That article is behind a paywall, but there’s a similar one on their blog.) I wouldn’t recommend everyone go buy one, but the likelihood that you have access to one in one way or another is pretty good: a friend, a local makerspace or library, or even an online service that will sell you a print from an STL.
As I’ve mentioned previously, I’ve spent a large part of my career working as a mechanical engineer, and when I shut down a small company I had started, I was left with a Prusa MK3 printer (latest version as of this writing is the MK4S, highly recommended) as well as a seat of SOLIDWORKS, an expensive-but-very-capable piece of CAD software. I use both all the time to create all sorts of tools, fixtures and jigs for the shop.
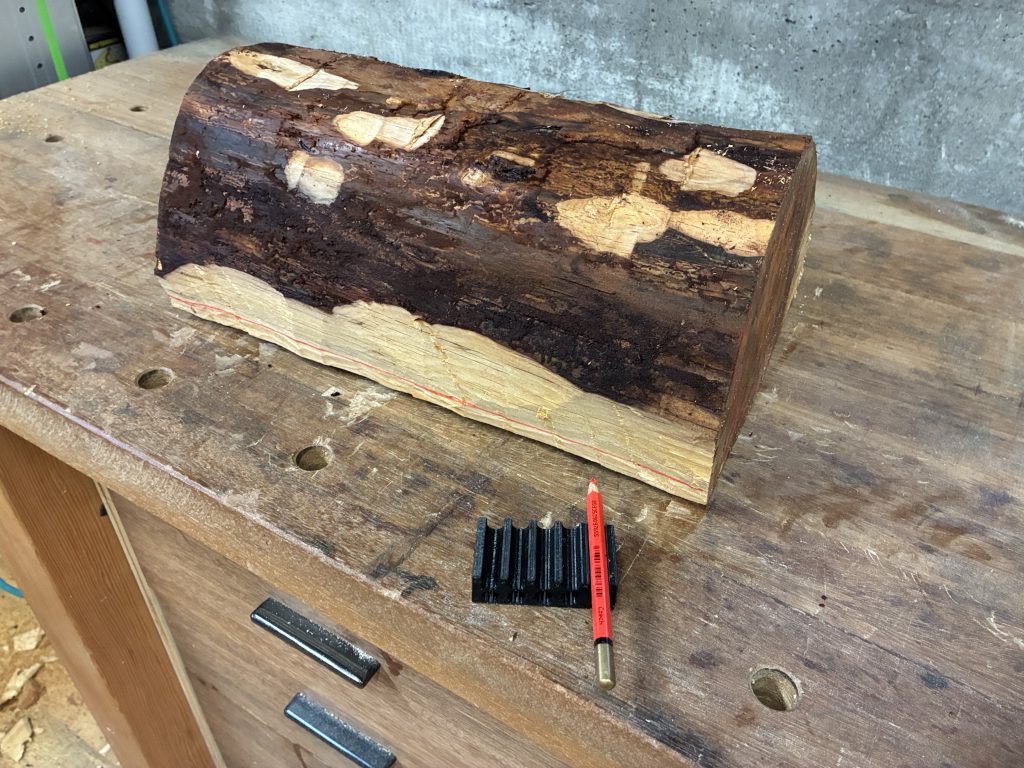
There’s a step in the bowl-making process (as outlined in Elia Bizzari and Dave Fisher’s fantastic class) where you scribe a line around the outside of a log at some variable height off the workbench. Sure, you can find or cut a piece of scrap wood to just the right height every time, but I figured it’d be handy to always have a block with a bunch of different heights available. Thus, the pencil height gauge was born:
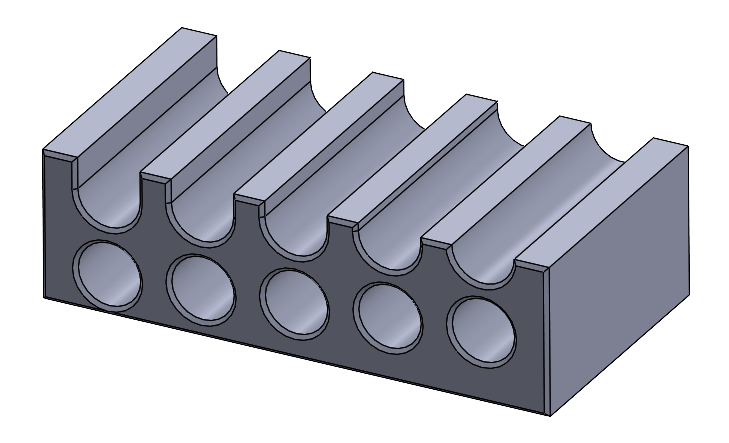
By sliding a pencil in one of the holes, you can offset your line between 5 and 19 mm off the benchtop in 1 mm increments (plenty for woodworking), and if you set the block on its end, you can get some other offsets as well.
Here’s what it looks like in use:
You can download both the original CAD file (SOLIDWORKS 2020 format) and STL file (ready to print; no CAD software required) on Printables.